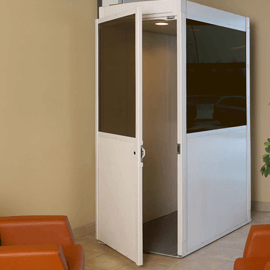
Delta Inclined Platform Lift
LeMoyne College in Syracuse, NY / This inclined platform lift is ideal for making public buildings easily accessible.
Contact Us
Although each of these moves a car with a different mechanism, all generally have the same basic parts: a hoistway, a car, and a system above or below for moving the car. A hydraulic elevator additionally has a pit and machine room. Elevator installation, as a result, can take a day to install a pneumatic system or up to four days for a hydraulic system.
Pneumatic elevator installation tends to be quicker, as little to no construction is involved. A hoistway does not need to be built into the interior or exterior of your house. Rather, a clear hoistway is already put together and just needs to be installed onto a flat surface.
 So you're getting ready to install a vacuum elevator, and you're not sure if you're adequately prepared. Well, let us first start by saying that vacuum elevators are the easiest elevator models to install, so take a deep breath. With a few helpful tips, you'll be on your way to installing and using your new vacuum elevator. Here are some tips for easy, effective, quick installation.
Be Prepared – The first thing you should do is get prepared. It's true that vacuum elevators are easy to install and even easier to maintain; however, if you want your elevator up and functional before you have to go back to work on Monday, make sure you're prepared to start installing before the parts are even delivered. Here is how you can get prepared; first of all, if you have small children or pets, make sure you get them out of the house. You don't want to be juggling installation as well as parenting, so send the kids off to grandma's house and ask a neighbor if they can watch the family pet for the day. Next, you should prepare the infrastructure of your home. If your vacuum elevator is going through the floors and is not being built alongside a landing, make sure you take the time to cut out the proper size hole so that the elevator shaft can run through the floor. By doing all the prep work ahead of time, you'll be able to easily, quickly, and effectively set up the elevator as soon as the parts arrive.
Ask for Help – We know you're used to getting things done on your own; however, this job is not ideal for one person. Even though installation is relatively easy, parts can be large and bulky, and we don't want you to risk dropping any parts and damaging the elevator or hurting yourself. Instead of trying to muscle everything together by yourself, ask a close friend, relative, or neighbor to give you a hand. The job will get done twice as fast with four hands, and you'll have someone with you in case you get hurt.
Stay Organized – We know this can be challenging, but try to stay organized as you build. We recommend that you skim through the installation manual before doing anything and get to know each part before you rip open the packaging. Group the parts so you know where they go and in what order they should be installed. As you begin building the vacuum shaft, make sure you keep packaging materials out of the way to prevent injury. Work slowly and effectively, so that you know where everything is at all times. Whatever you do, don't throw away any important packaging or paperwork until after you've finished installation and the elevator has been tested. After you're confident that installation was a success, keep all documents that came with the elevator in case there is a problem in the near future.
Hydraulic elevators, an overall larger design, have more parts. A car attached to a lifting system, this type of elevator consists of a fluid-driven piston inside a cylinder, which is connected to a system of a tank, pump, and valve. A hoistway and entrances additionally need to be installed into your home.
Hydraulic elevator installation can be a four- or five-day procedure. Prior to any changes being made to your home or building, your property is surveyed and drawings of the system are created. When installation begins, the hoistway and basic components of a hydraulic system are added. Procedures at this initial stage may include plumbing the hoistway; installing guide rail brackets, guide rails, the hydraulic cylinder, the controller, the power unit, and the hydraulic hose line; and wiring the power unit to the controller.
 Not all elevator installations are the same. The process can differ, depending on the size of the building, the size of the elevator, and, of course, the power source that drives the elevator. Having said this, installing hydraulic elevators is different than installing cable driven elevators or pneumatic elevators.
Pit and Landings – The first task of installing a hydraulic elevator is creating the pit and landings, so let's first talk about a pit. Like most common elevators, a pit must be dug a few feet below the foundation or ground floor of the building. After the pit is dug, an additional hole must be dug to house the piston cylinder. This can be a huge project, especially if the building has more than just a few floors. The piston is responsible for raising and lowering the elevator car, and since it must be retracted completely when the car is at ground level, the cylinder must be as long as the elevator shaft. For a 10-story building, a nine-story deep hole must be dug for the cylinder and piston. After the pit and cylinder hole have been dug and reinforced, usually with concrete, the landings can be assembled. Landings are created by cutting holes in the walls where the elevator will make each stop. The landings should be barricaded for safety reasons until installation is complete.
The Hoistway – Hoistways can be built one of two ways. The first is modularly. A modular hoistway is constructed off site and then brought in to be installed as one piece. This is the easiest and fastest way of erecting a hoistway, granted you have access to a crane. If you don't have access to a crane or if the location makes operating one difficult or dangerous, the second method is to stick build the hoistway. Stick building is done on site and takes longer to build; however, it is generally a good, solid way of constructing the shaft. After the hoistway is built, the cylinder, piston, and pump can be installed. The pump will either be installed in the pit itself or in a separate machine room. After it is assembled, it will be attached to the moveable piston.
Power and Safety – After the hoistway has been erected and the pump is attached to the piston, it is time to secure the elevator car and hook up the hydraulic power. In order to supply power, electrical disconnects must be installed. Also, hydraulic oil must be added to the fluid tank and piping must be installed between the elevator jack and the power unit. Once this is done and all systems have been checked, the elevator is ready to run. For safety reasons, self-closing and locking doors, climate control, emergency lights, emergency communication, and smoke detectors will be installed.
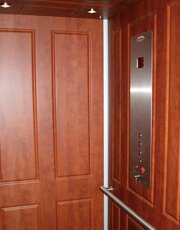
After this set of procedures, the framework for the car is put in place. This may include installing and roping the frame, testing it, installing a platform, and wiring and piping the hoistway. Once these two basic parts have been added, the entrances and the car are installed and finished. Adjusting any locks is typically the final part of elevator installation.
Apex Delta Wheelchair Lift Platform Wheelchair Lift Apex Elevators Freedom Commercial LULA Freedom Elite Luxury Elevators Freedom Green Home Elevator Elevators for Wheelchairs Indy Curve Stair Lifts Electric Stair Lift Indy Lux Indy Outdoor Stair Lift Indy Platform Lifts Indoor Outdoor Stair Lifts Indy XL Outdoor Stair Lift Commercial Dumbwaiter Elevators Small Commercial Elevators Stiltz Duo Shaft-Less Elevator Stiltz Trio Shaft-Less Elevator Jeeves Dumbwaiter Food Svc Lift Home Elevator Lift Systems Residential Glass Elevator Plan Best Home Elevator Companies Home Elevators Prices & Installation Home Hydraulic Elevator System Home Hydraulic Elevators Residential Laundry Dumbwaiter Home Lift Elevators Dumbwaiter in Restaurants Jeeves Dumbwaiter Lifts Curved or Straight Stair Lift Design Traditional vs. Contemporary Elevators What Happens to Elevator During a Fire? Home & Commercial Wheelchair Elevator Systems Electric or Hydraulic Home Wheelchair Lift Jeeves Econo Lift
Florida Massachusetts North Carolina New Hampshire New Jersey New York Texas Utah California Colorado Florida Georgia Illinois Kansas Maryland Michigan North Carolina South Carolina Austin Texas Dallas Texas Fort Worth Texas Frisco Texas Houston Texas Sugarland Texas Texas Washington Residential Elevator for Sale Residential Elevator Manufacturer Pneumatic & Hydraulic Home Elevators Residential Elevator System Small Residential Home Elevators Small Commercial & Residential Elevators
Nationwide Lifts Local Offices Free Home Elevator Price Quote Nationwide Lifts Warranty Comprehensive Elevator Articles Free Stair Lift Book Advantages of a Dumbwaiter Traveling Cable Elevator Manufacturers Elevator Price Guide Cost of Installing New Elevator in Home Weight Capacity for Home Elevator DIY Home Dumbwaiter Installation Home Elevator Inspection Cost of Dumbwaiter Elevator Dumbwaiters Info Home Mobility Needs Choosing Home Elevator Company Shaft & Cab Elevator System Design Residential Elevator Dimensions & Specs Use Elevators for Home Mechanics of an Elevator: Simple Machines Installing Hydraulic Elevator Elevator Installation Checklist How Does Pneumatic Elevator Work? Hydraulic Elevator vs. Vacuum Elevator Home Elevator Fits Wheelchair Traditional Home Elevator Installation Duration Commercial Elevator Maintenance Home Elevator Safety Systems Home Modifications for Accessibility Dumbwaiter Elevator Kits Home & Commercial Elevator Lifts Elevator Maintenance Company Pneumatic Glass Residential Elevators Residential Handicap Elevator Home Handicapped Elevator

LeMoyne College in Syracuse, NY / This inclined platform lift is ideal for making public buildings easily accessible.
Contact Us
Santa Cruz, CA / This project boasts stainless steel cab walls and stainless steel sliding doors.
Contact Us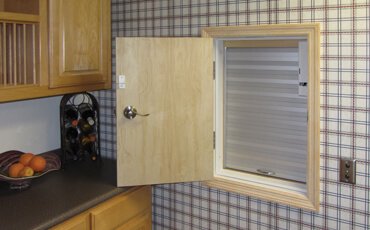
Sacramento, CA / The Jeeves Econo-Lift is ideal for food, groceries, and laundry.
Contact Us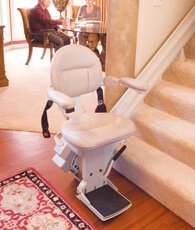
Milwaukee, WI / This stair lift features 400 lb capacity and the finest upholstery.
Contact Us
Miami, FL / This vacuum elevator is sized to accommodate a wheelchair.
Contact Us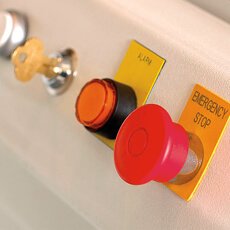
Los Angeles, CA / This is an easy way to add accessibility to a home or business.
Contact Us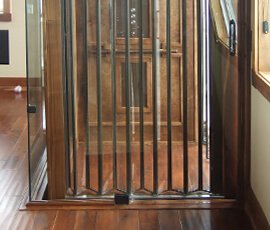
Dallas, TX / This economical elevator has unlimited options for customization.
Contact Us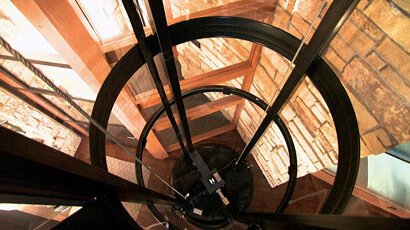
Sacramento, CA / The Freedom Green is the most economical home elevator offered by Nationwide Lifts.
Contact UsAs America's leader in home elevators, we understand your connection to your home and we realize the important role our products have in your lives. That's why Nationwide Lifts is the only residential elevator company to offer its customers a large selection of products, the industry's best warranty, 24/7 phone support and a network of offices across the United States.
Get a Quote"It's the first elevator we have ever had installed and it went very smooth. It came together excellent! Coordination and delivery went very well. The inspection passed with flying colors."
 Glenn Roehl
"Nationwide Lifts is excellent. They solved all our problems in an efficient and effective manner. Love the company!"
Michael Sims"I cannot express in words the peace of mind this gave me and the ENORMOUS gratitude we have! Our experience with your company's customer service was outstanding. We are very happy with the product we purchased, and cannot thank you enough!"
Victoria Orgel